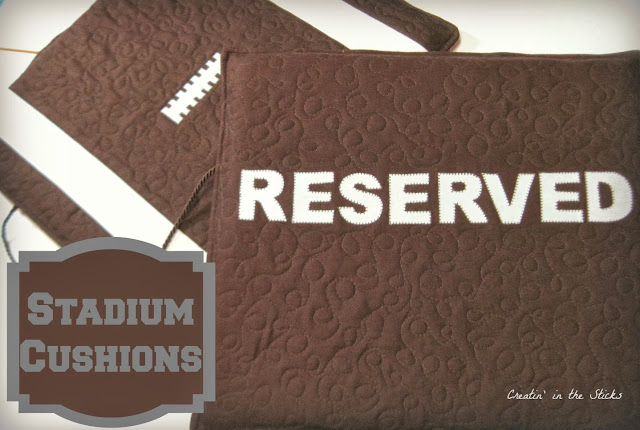
If you've ever sat on hard bleachers, you will want to make one of these.
This is a special stadium cushion for a grandmother that attends every single game her grandchildren are in. She will always have a reserved seat at the big game.
Here is how to make your own stadium cushion for the big game. I've included both the personalized stadium seat and the football stadium seat cushion in this tutorial.
Stadium Cushions
For a personalized cushion
Supplies:
1 - 1"x15"x17" foam
20" x 41" muslin
19" x 40" batting
2 - pieces of cotton fabric 17 1/2" x 19 1/2"
1 - 8" piece of cording
For letters:
Fusible applique (like HeatNBond)
Letters printed from a computer
Fabric
Fold one of the pieces of fabric in half both ways and press to make straight lines as a guide for appliqueing the letters.
Prepare the letters. I like to skip steps to speed this process. First I print letters in my desired font and size from my computer and cut them apart. I fuse the HeatNBond to the back of the fabric then pin the letters to the front of the fabric. Then I just cut out the letters. No tracing, no trying to figure out the reverse, and I can cut out several of the same letters out at one time by stacking the fabric under the pinned letter. Fast and easy.
Using the pressed lines as guides, layout the letters and fuse according to the manufacturer's instructions.
I used a blanket stitch to stitch around all the letters. You want to make it durable because it is a cushion that will be used to sit on.
With right sides together, stitch the two fabric pieces together using a 1/2" seam. Press seam open.
(Football cushion continue here)
Create a quilt sandwich with the muslin on bottom, batting in the middle, and cushion cover on top. Baste. I pin baste.
Quilt as desired. I quilted free motion with loop de loops. Straight lines would be great too. Trim the excess batting and muslin off.
Once quilted, fold in half lengthwise and mark center at the end shown. Measure 2" on each side of the center pin to place the ends of the cord. Sew the ends in place (as shown above) an 1/8" from the ends.
Fold the quilt in half with right sides together and pin. Leave a 7 inch space at one end for turning.
Stitch around the edges (not the folded edge) with a 1/2" seam leaving the 7-inch opening.
Clip the corners and turn right side out.
Now for the fun part, stuff that foam into the cushion cover. I fold mine in thirds and then stuff it in pulling it into the corners.
Pin the opening closed. You can slip stitch it, if you would prefer, but I'm always cutting corners, so...
I pin around the outside all around (pulling out the corners really well as I go), and then top stitch, using a walking foot, 1/4" from the edge.
All that's left to do is go to the game and never have a sore bottom again.
If you want to make a football stadium seat. You will follow the same instructions, except there will be a little piecing for the top.
For a football cushion
Supplies:
1 - 1"x15"x17" foam
20" x 41" muslin
19" x 40" batting
1 - piece of brown cotton fabric 12" x 18"
2 - pieces of brown cotton fabric 3" x 18"
2 - pieces of white cotton fabric 3" x 18"
1 - 20" x 18" piece of your favorite team fabric (or brown)
1 - 8" piece of cording
For laces
Fusible applique (like HeatNBond)
Laces are drawn on 1/4" graph paper using the diagram below
1/2" seams are used to put the cushion cover together.
Draw out and cut the laces. Fuse the back of white fabric and once again pin your drawing to the top of the fabric and cut it out.
Fold the 12" x 18" piece of fabric in half and then in half again and press. This is your guide to center the laces. Fuse (according to manufactures instructions) and stitch around the laces. I like a blanket stitch, but use your favorite. It needs to be durable.
Once the laces are attached, sew one white strip to one brown strip with 1/2" seam allowances. Repeat. Now sew each strip set to each side of the lace panel like in the finished picture. Sew the team fabric right sides together to the football panel you made using a 1/2" seam and sewing it on a 18" side. This will make a long cushion cover that you will quilt. Go above to the quilt sandwich instructions and continue from there.
My Chiefs play tomorrow in the playoffs!
GO CHIEFS!


5 comments:
This grandma needs a cushion for sitting on any hard seat and for putting on the back of hard chairs.
I marked this paqe. Plan to make two, one to sit on and one to lean on. thanks for the pattern.
Great cushion and a brilliant tutorial, Carla - that'll keep Grandma comfy :)
Folding the insert in thirds is such a great idea. Wish I had known that when making crib bumper pads. :)
Great tutorial and perfect for those hard bleachers we have to sit on. Thank you!
Good idea for guys and grandmas. Thanks for the tutorial. Way to go kicking off this fun blog hop … :) Pat
Post a Comment